|
|
# 36|数据流原理:Vuex & Pinia源码剖析
|
|
|
|
|
|
你好,我是大圣。
|
|
|
|
|
|
上一讲我们分析了Vite原理,今天我们来剖析Vuex的原理。其实在之前的课程中,我们已经实现过一个迷你的Vuex,整体代码逻辑比较简单,基于Vue提供的响应式函数reactive和computed的能力,我们封装了一个独立的共享数据的store,并且对外暴露了commit和dispatch方法修改和更新数据,这些原理就不赘述了。
|
|
|
|
|
|
今天我们探讨一下下一代Vuex5的提案,并且看一下实际的代码是如何实现的,你学完之后可以对比之前gvuex mini版本,感受一下两者的区别。
|
|
|
|
|
|
## Vuex5提案
|
|
|
|
|
|
由于Vuex有模块化namespace的功能,所以模块user中的mutation add方法,我们需要使用 `commit('user/add')` 来触发。这样虽然可以让Vuex支持更复杂的项目,但是**这种字符串类型的拼接功能,在TypeScript4之前的类型推导中就很难实现**。然后就有了Vuex5相关提案的讨论,整个讨论过程都是在GitHub的issue里推进的,你可以访问[GitHub链接](https://github.com/vuejs/rfcs/pull/271)去围观。
|
|
|
|
|
|
Vuex5的提案相比Vuex4有很大的改进,解决了一些Vuex4中的缺点。Vuex5能够同时支持Composition API和Option API,并且去掉了namespace模式,使用组合store的方式更好地支持了TypeScript的类型推导,还去掉了容易混淆的Mutation和Action概念,只保留了Action,并且**支持自动的代码分割**。
|
|
|
|
|
|
我们也可以通过对这个提案的研究,来体验一下在一个框架中如何讨论新的语法设计和实现,以及如何通过API的设计去解决开发方式的痛点。你可以在Github的提案RFCs中看到[Vuex5的设计文稿](https://github.com/vuejs/rfcs/blob/34a8b0d541a361a37d05de8d67cb44a7b6f6fd12/active-rfcs/0000-vuex-5.md),而Pinia正是基于Vuex5设计的框架。
|
|
|
|
|
|
现在Pinia已经正式合并到Vue组织下,成为了Vue的官方项目,尤雨溪也在多次分享中表示**Pinia就是未来的Vuex**,接下来我们就好好学习一下Pinia的使用方式和实现的原理。
|
|
|
|
|
|
## Pinia
|
|
|
|
|
|
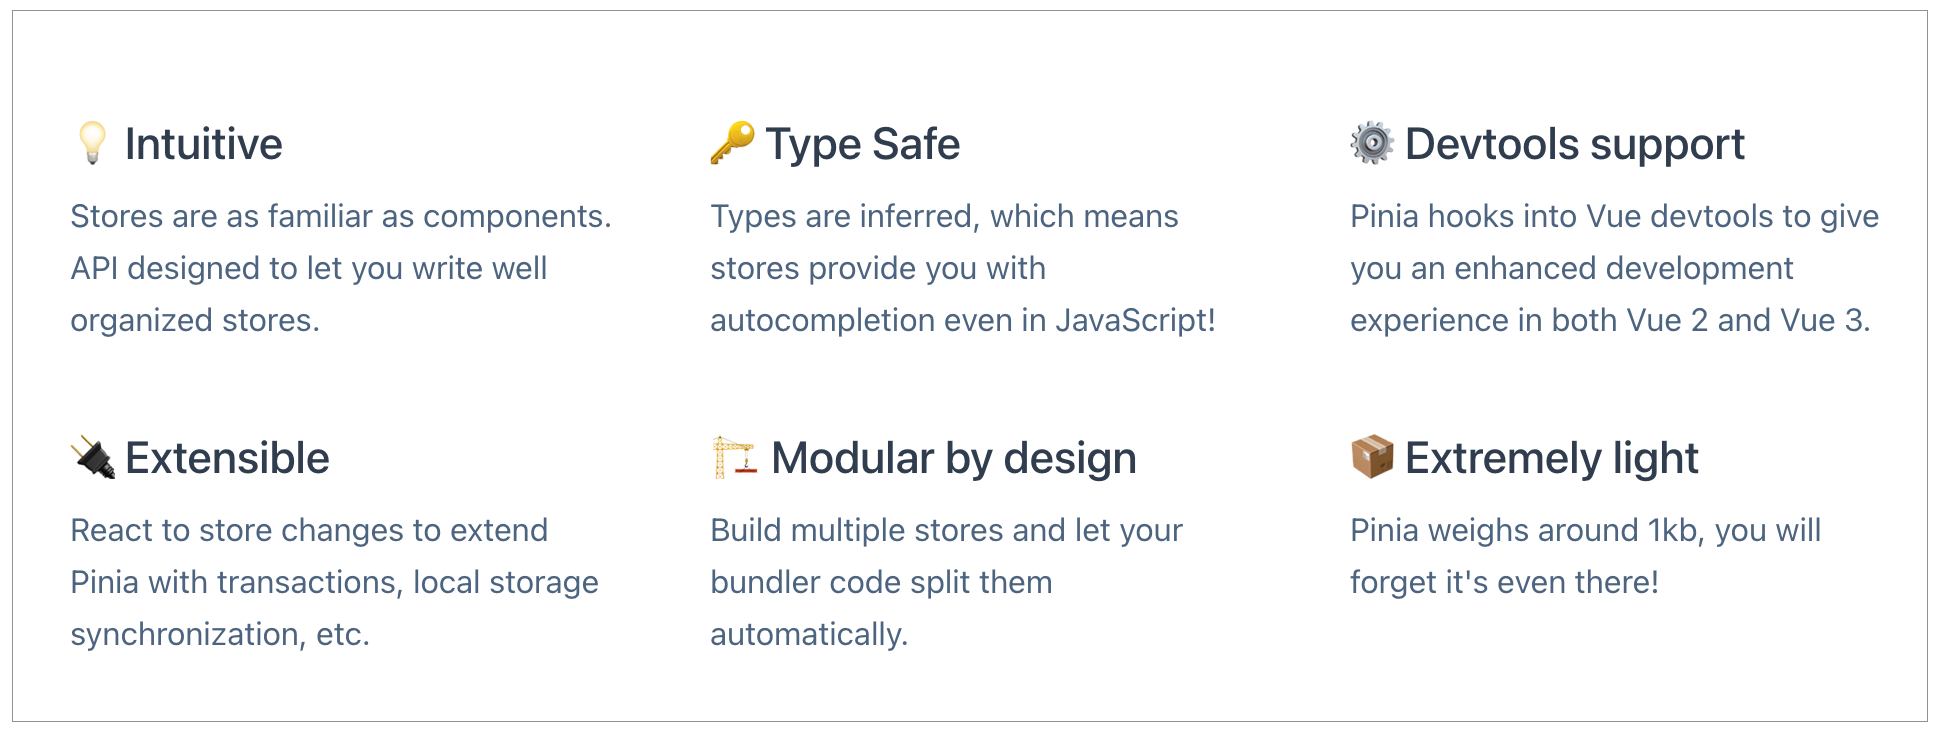
下图是Pinia官网的介绍,可以看到类型安全、Vue 的Devtools支持、易扩展、只有1KB的体积等优点。快来看下Pinia如何使用吧。
|
|
|
|
|
|
|
|
|
|
|
|
首先我们在项目根目录下执行下面的命令去**安装Pinia的最新版本**。
|
|
|
|
|
|
```javascript
|
|
|
npm install pinia@next
|
|
|
|
|
|
```
|
|
|
|
|
|
然后在src/main.js中,我们导入createPinia方法,通过createPinia方法创建Pinia的实例后,再通过app.use方法注册Pinia。
|
|
|
|
|
|
```javascript
|
|
|
import { createApp } from 'vue'
|
|
|
import { createPinia } from 'pinia'
|
|
|
import App from './App.vue'
|
|
|
const pinia = createPinia()
|
|
|
const app = createApp(App)
|
|
|
app.use(pinia).mount('#app')
|
|
|
|
|
|
|
|
|
```
|
|
|
|
|
|
然后我们可以在store文件夹中创建一个count.js。下面的代码中我们通过Pinia的defineStore方法定义了一个store,store内部通过state返回一个对象,并且通过Actions配置修改数据的方法add。这里使用的语法和Vuex比较类似,只是删除了Mutation的概念,**统一使用Actions来配置**。
|
|
|
|
|
|
```javascript
|
|
|
|
|
|
|
|
|
import { defineStore } from 'pinia'
|
|
|
|
|
|
export const useCounterStore = defineStore('count', {
|
|
|
id:'count',
|
|
|
state: () => {
|
|
|
return { count: 1 }
|
|
|
},
|
|
|
actions: {
|
|
|
add() {
|
|
|
this.count++
|
|
|
},
|
|
|
},
|
|
|
})
|
|
|
|
|
|
|
|
|
```
|
|
|
|
|
|
然后我们可以使用Composition的方式在代码中使用store。注意上面的store返回的其实就是一个Composition风格的函数,使用useCounterStore返回count后,可以在add方法中直接使用count.add触发Actions,实现数据的修改。
|
|
|
|
|
|
```javascript
|
|
|
import { useCounterStore } from '../stores/count'
|
|
|
|
|
|
const count = useCounterStore()
|
|
|
function add(){
|
|
|
count.add()
|
|
|
}
|
|
|
|
|
|
|
|
|
|
|
|
```
|
|
|
|
|
|
**我们也可以使用Composition风格的语法,去创建一个store。**使用ref或者reactive包裹后,通过defineStore返回,这样store就非常接近我们自己分装的Composition语法了,也去除了很多Vuex中特有的概念,学习起来更加简单。
|
|
|
|
|
|
```javascript
|
|
|
export const useCounterStore = defineStore('count', () => {
|
|
|
const count = ref(0)
|
|
|
function increment() {
|
|
|
count.value++
|
|
|
}
|
|
|
|
|
|
return { count, increment }
|
|
|
})
|
|
|
|
|
|
|
|
|
```
|
|
|
|
|
|
## Pinna源码
|
|
|
|
|
|
然后我们通过阅读Pinia的源码,来看下Pinia是如何实现的。
|
|
|
|
|
|
首先我们进入到Pinia的GitHub中,我们可以在packages/pinia/src/createPinia.ts中看到createPinia函数的实现。
|
|
|
|
|
|
下面的代码中,我们通过effectScope创建一个作用域对象,并且通过ref创建了响应式的数据对象state。然后通过install方法支持了app.use的注册,内部通过provide的语法和全局的$pinia变量配置Pinia对象,并且通过use方法和toBeInstalled数组实现了Pinia的插件机制。**最后还通过pinia.use(devtoolsPlugin) 实现了对VueDevtools的支持。**
|
|
|
|
|
|
```javascript
|
|
|
export function createPinia(): Pinia {
|
|
|
const scope = effectScope(true)
|
|
|
// NOTE: here we could check the window object for a state and directly set it
|
|
|
// if there is anything like it with Vue 3 SSR
|
|
|
const state = scope.run(() => ref<Record<string, StateTree>>({}))!
|
|
|
|
|
|
let _p: Pinia['_p'] = []
|
|
|
// plugins added before calling app.use(pinia)
|
|
|
let toBeInstalled: PiniaPlugin[] = []
|
|
|
|
|
|
const pinia: Pinia = markRaw({
|
|
|
install(app: App) {
|
|
|
// this allows calling useStore() outside of a component setup after
|
|
|
// installing pinia's plugin
|
|
|
setActivePinia(pinia)
|
|
|
if (!isVue2) {
|
|
|
pinia._a = app
|
|
|
app.provide(piniaSymbol, pinia)
|
|
|
app.config.globalProperties.$pinia = pinia
|
|
|
toBeInstalled.forEach((plugin) => _p.push(plugin))
|
|
|
toBeInstalled = []
|
|
|
}
|
|
|
},
|
|
|
|
|
|
use(plugin) {
|
|
|
if (!this._a && !isVue2) {
|
|
|
toBeInstalled.push(plugin)
|
|
|
} else {
|
|
|
_p.push(plugin)
|
|
|
}
|
|
|
return this
|
|
|
},
|
|
|
|
|
|
_p,
|
|
|
_a: null,
|
|
|
_e: scope,
|
|
|
_s: new Map<string, StoreGeneric>(),
|
|
|
state,
|
|
|
})
|
|
|
if (__DEV__ && IS_CLIENT) {
|
|
|
pinia.use(devtoolsPlugin)
|
|
|
}
|
|
|
|
|
|
return pinia
|
|
|
}
|
|
|
|
|
|
|
|
|
```
|
|
|
|
|
|
通过上面的代码,我们可以看到Pinia实例就是 ref({}) 包裹的响应式对象,项目中用到的state都会挂载到Pinia这个响应式对象内部。
|
|
|
|
|
|
然后我们去看下创建store的defineStore方法, defineStore内部通过useStore方法去定义store,并且每个store都会标记唯一的ID。
|
|
|
|
|
|
首先通过getCurrentInstance获取当前组件的实例,如果useStore参数没有Pinia的话,就使用inject去获取Pinia实例,**这里inject的数据就是createPinia函数中install方法提供的**。
|
|
|
|
|
|
然后设置activePinia,项目中可能会存在很多Pinia的实例,设置activePinia就是设置当前活跃的Pinia实例。这个函数的实现方式和Vue中的componentInstance很像,每次创建组件的时候都设置当前的组件实例,这样就可以在组件的内部通过getCurrentInstance获取,最后通过createSetupStore或者createOptionsStore创建组件。
|
|
|
|
|
|
这就是上面代码中我们使用Composition和Option两种语法创建store的不同执行逻辑,最后通过pinia.\_s缓存创建后的store,\_s就是在createPinia的时候创建的一个Map对象,防止store多次重复创建。**到这store创建流程就结束了。**
|
|
|
|
|
|
```javascript
|
|
|
export function defineStore(
|
|
|
// TODO: add proper types from above
|
|
|
idOrOptions: any,
|
|
|
setup?: any,
|
|
|
setupOptions?: any
|
|
|
): StoreDefinition {
|
|
|
let id: string
|
|
|
let options:...
|
|
|
const isSetupStore = typeof setup === 'function'
|
|
|
if (typeof idOrOptions === 'string') {
|
|
|
id = idOrOptions
|
|
|
// the option store setup will contain the actual options in this case
|
|
|
options = isSetupStore ? setupOptions : setup
|
|
|
} else {
|
|
|
options = idOrOptions
|
|
|
id = idOrOptions.id
|
|
|
}
|
|
|
|
|
|
function useStore(pinia?: Pinia | null, hot?: StoreGeneric): StoreGeneric {
|
|
|
const currentInstance = getCurrentInstance()
|
|
|
pinia =
|
|
|
// in test mode, ignore the argument provided as we can always retrieve a
|
|
|
// pinia instance with getActivePinia()
|
|
|
(__TEST__ && activePinia && activePinia._testing ? null : pinia) ||
|
|
|
(currentInstance && inject(piniaSymbol))
|
|
|
if (pinia) setActivePinia(pinia)
|
|
|
|
|
|
pinia = activePinia!
|
|
|
|
|
|
if (!pinia._s.has(id)) {
|
|
|
// creating the store registers it in `pinia._s`
|
|
|
if (isSetupStore) {
|
|
|
createSetupStore(id, setup, options, pinia)
|
|
|
} else {
|
|
|
createOptionsStore(id, options as any, pinia)
|
|
|
}
|
|
|
|
|
|
/* istanbul ignore else */
|
|
|
if (__DEV__) {
|
|
|
// @ts-expect-error: not the right inferred type
|
|
|
useStore._pinia = pinia
|
|
|
}
|
|
|
}
|
|
|
|
|
|
const store: StoreGeneric = pinia._s.get(id)!
|
|
|
|
|
|
// save stores in instances to access them devtools
|
|
|
if (
|
|
|
__DEV__ &&
|
|
|
IS_CLIENT &&
|
|
|
currentInstance &&
|
|
|
currentInstance.proxy &&
|
|
|
// avoid adding stores that are just built for hot module replacement
|
|
|
!hot
|
|
|
) {
|
|
|
const vm = currentInstance.proxy
|
|
|
const cache = '_pStores' in vm ? vm._pStores! : (vm._pStores = {})
|
|
|
cache[id] = store
|
|
|
}
|
|
|
|
|
|
// StoreGeneric cannot be casted towards Store
|
|
|
return store as any
|
|
|
}
|
|
|
|
|
|
useStore.$id = id
|
|
|
|
|
|
return useStore
|
|
|
}
|
|
|
|
|
|
|
|
|
```
|
|
|
|
|
|
在Pinia中createOptionsStore内部也是调用了createSetupStore来创建store对象。下面的代码中,我们通过assign方法实现了setup函数,这里可以看到computed的实现,内部就是通过pinia.\_s缓存获取store对象,调用store的getters方法来模拟,最后依然通过createSetupStore创建。
|
|
|
|
|
|
```javascript
|
|
|
function createOptionsStore<
|
|
|
Id extends string,
|
|
|
S extends StateTree,
|
|
|
G extends _GettersTree<S>,
|
|
|
A extends _ActionsTree
|
|
|
>(
|
|
|
id: Id,
|
|
|
options: DefineStoreOptions<Id, S, G, A>,
|
|
|
pinia: Pinia,
|
|
|
hot?: boolean
|
|
|
): Store<Id, S, G, A> {
|
|
|
const { state, actions, getters } = options
|
|
|
|
|
|
const initialState: StateTree | undefined = pinia.state.value[id]
|
|
|
|
|
|
let store: Store<Id, S, G, A>
|
|
|
|
|
|
function setup() {
|
|
|
|
|
|
pinia.state.value[id] = state ? state() : {}
|
|
|
return assign(
|
|
|
localState,
|
|
|
actions,
|
|
|
Object.keys(getters || {}).reduce((computedGetters, name) => {
|
|
|
computedGetters[name] = markRaw(
|
|
|
computed(() => {
|
|
|
setActivePinia(pinia)
|
|
|
// it was created just before
|
|
|
const store = pinia._s.get(id)!
|
|
|
return getters![name].call(store, store)
|
|
|
})
|
|
|
)
|
|
|
return computedGetters
|
|
|
}, {} as Record<string, ComputedRef>)
|
|
|
)
|
|
|
}
|
|
|
|
|
|
store = createSetupStore(id, setup, options, pinia, hot)
|
|
|
|
|
|
return store as any
|
|
|
}
|
|
|
|
|
|
```
|
|
|
|
|
|
最后我们来看一下createSetupStore函数的实现。这个函数也是Pinia中最复杂的函数实现,内部的$patch函数可以实现数据的更新。如果传递的参数partialStateOrMutator是函数,则直接执行,否则就通过mergeReactiveObjects方法合并到state中,最后生成subscriptionMutation对象,**通过triggerSubscriptions方法触发数据的更新**。
|
|
|
|
|
|
```javascript
|
|
|
function $patch(
|
|
|
partialStateOrMutator:
|
|
|
| _DeepPartial<UnwrapRef<S>>
|
|
|
| ((state: UnwrapRef<S>) => void)
|
|
|
): void {
|
|
|
let subscriptionMutation: SubscriptionCallbackMutation<S>
|
|
|
isListening = isSyncListening = false
|
|
|
// reset the debugger events since patches are sync
|
|
|
/* istanbul ignore else */
|
|
|
if (__DEV__) {
|
|
|
debuggerEvents = []
|
|
|
}
|
|
|
if (typeof partialStateOrMutator === 'function') {
|
|
|
partialStateOrMutator(pinia.state.value[$id] as UnwrapRef<S>)
|
|
|
subscriptionMutation = {
|
|
|
type: MutationType.patchFunction,
|
|
|
storeId: $id,
|
|
|
events: debuggerEvents as DebuggerEvent[],
|
|
|
}
|
|
|
} else {
|
|
|
mergeReactiveObjects(pinia.state.value[$id], partialStateOrMutator)
|
|
|
subscriptionMutation = {
|
|
|
type: MutationType.patchObject,
|
|
|
payload: partialStateOrMutator,
|
|
|
storeId: $id,
|
|
|
events: debuggerEvents as DebuggerEvent[],
|
|
|
}
|
|
|
}
|
|
|
nextTick().then(() => {
|
|
|
isListening = true
|
|
|
})
|
|
|
isSyncListening = true
|
|
|
// because we paused the watcher, we need to manually call the subscriptions
|
|
|
triggerSubscriptions(
|
|
|
subscriptions,
|
|
|
subscriptionMutation,
|
|
|
pinia.state.value[$id] as UnwrapRef<S>
|
|
|
)
|
|
|
}
|
|
|
|
|
|
|
|
|
```
|
|
|
|
|
|
然后定义partialStore对象去存储ID、$patch、Pinia实例,并且新增了subscribe方法。再调用reactive函数把partialStore包裹成响应式对象,通过pinia.\_s.set的方法实现store的挂载。
|
|
|
|
|
|
最后我们通过pinia.\_s.get获取的就是partialStore对象,defineStore返回的方法useStore就可以通过useStore去获取缓存的Pinia对象,实现对数据的更新和读取。
|
|
|
|
|
|
这里我们也可以看到,除了直接执行Action方法,还可以通过调用内部的 `count.$patch({count:count+1})` 的方式来实现数字的累加。
|
|
|
|
|
|
```javascript
|
|
|
const partialStore = {
|
|
|
_p: pinia,
|
|
|
// _s: scope,
|
|
|
$id,
|
|
|
$onAction: addSubscription.bind(null, actionSubscriptions),
|
|
|
$patch,
|
|
|
$reset,
|
|
|
$subscribe(callback, options = {}) {
|
|
|
const removeSubscription = addSubscription(
|
|
|
subscriptions,
|
|
|
callback,
|
|
|
options.detached,
|
|
|
() => stopWatcher()
|
|
|
)
|
|
|
const stopWatcher = scope.run(() =>
|
|
|
watch(
|
|
|
() => pinia.state.value[$id] as UnwrapRef<S>,
|
|
|
(state) => {
|
|
|
if (options.flush === 'sync' ? isSyncListening : isListening) {
|
|
|
callback(
|
|
|
{
|
|
|
storeId: $id,
|
|
|
type: MutationType.direct,
|
|
|
events: debuggerEvents as DebuggerEvent,
|
|
|
},
|
|
|
state
|
|
|
)
|
|
|
}
|
|
|
},
|
|
|
assign({}, $subscribeOptions, options)
|
|
|
)
|
|
|
)!
|
|
|
|
|
|
return removeSubscription
|
|
|
}
|
|
|
|
|
|
|
|
|
const store: Store<Id, S, G, A> = reactive(
|
|
|
assign({}, partialStore )
|
|
|
)
|
|
|
|
|
|
// store the partial store now so the setup of stores can instantiate each other before they are finished without
|
|
|
// creating infinite loops.
|
|
|
pinia._s.set($id, store)
|
|
|
|
|
|
|
|
|
|
|
|
|
|
|
```
|
|
|
|
|
|
**我们可以看出一个简单的store功能,真正需要支持生产环境的时候,也需要很多逻辑的封装。**
|
|
|
|
|
|
代码内部除了\_\_dev\_\_调试环境中对Devtools支持的语法,还有很多适配Vue 2的语法,并且同时支持Optipn风格和Composition风格去创建store。createSetupStore等方法内部也会通过Map的方式实现缓存,并且setActivePinia方法可以在多个Pinia实例的时候获取当前的实例。
|
|
|
|
|
|
这些思路在Vue、vue-router源码中都能看到类似的实现方式,这种性能优化的思路和手段也值得我们学习,在项目开发中也可以借鉴。
|
|
|
|
|
|
## 总结
|
|
|
|
|
|
最后我们总结一下今天学到的内容吧。由于课程之前的内容已经手写了一个迷你的Vuex,这一讲我们就越过Vuex4,直接去研究了Vuex5的提案。
|
|
|
|
|
|
Vuex5针对Vuex4中的几个痛点,去掉了容易混淆的概念Mutation,并且去掉了对TypeScript不友好的namespace功能,使用组合store的方式让Vuex对TypeScript更加友好。
|
|
|
|
|
|
Pinia就是Vuex5提案产出的框架,现在已经是Vue官方的框架了,也就是Vuex5的实现。在Pinia的代码中,我们通过createPinia创建Pinia实例,并且可以通过Option和Composition两种风格的API去创建store,返回 useStore 函数获取Pinia的实例后,就可以进行数据的修改和读取。
|
|
|
|
|
|
## 思考
|
|
|
|
|
|
最后留一个思考题吧。对于数据共享语法,还有provide/inject和自己定义的Composition,什么时候需要使用Pinia呢?
|
|
|
|
|
|
欢迎到评论区分享你的想法,也欢迎你把这一讲的内容分享给你的朋友们,我们下一讲再见!
|
|
|
|