301 lines
11 KiB
Markdown
301 lines
11 KiB
Markdown
# 题目解答 | 期中考试版本参考实现
|
||
|
||
你好,我是朱涛。上节课我给你布置了一份考试题,你完成得怎么样了呢?这节课呢,我会来告诉你我是如何用Kotlin来做这个图片处理程序的,供你参考。
|
||
|
||
由于上节课我们已经做好了前期准备,所以这里我们直接写代码就行了。
|
||
|
||
## 1.0版本
|
||
|
||
对于图片反转和裁切的这个问题,如果一开始你就去想象一个大图片,里面有几万个像素点,那你可能会被吓到。但是,如果你将数据规模缩小,再来分析的话,你会发现这个问题其实很简单。
|
||
|
||
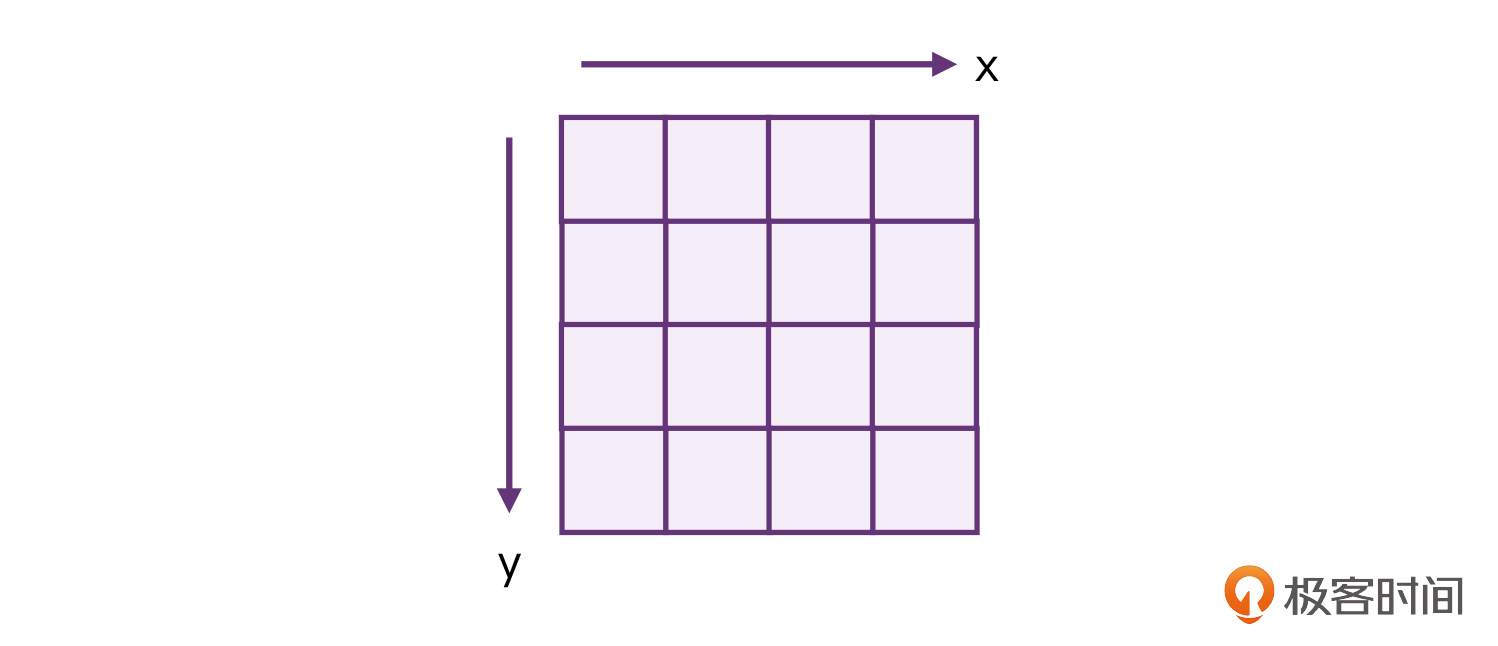
这里,我们就以一张4X4像素的照片为例来分析一下。
|
||
|
||
|
||
|
||
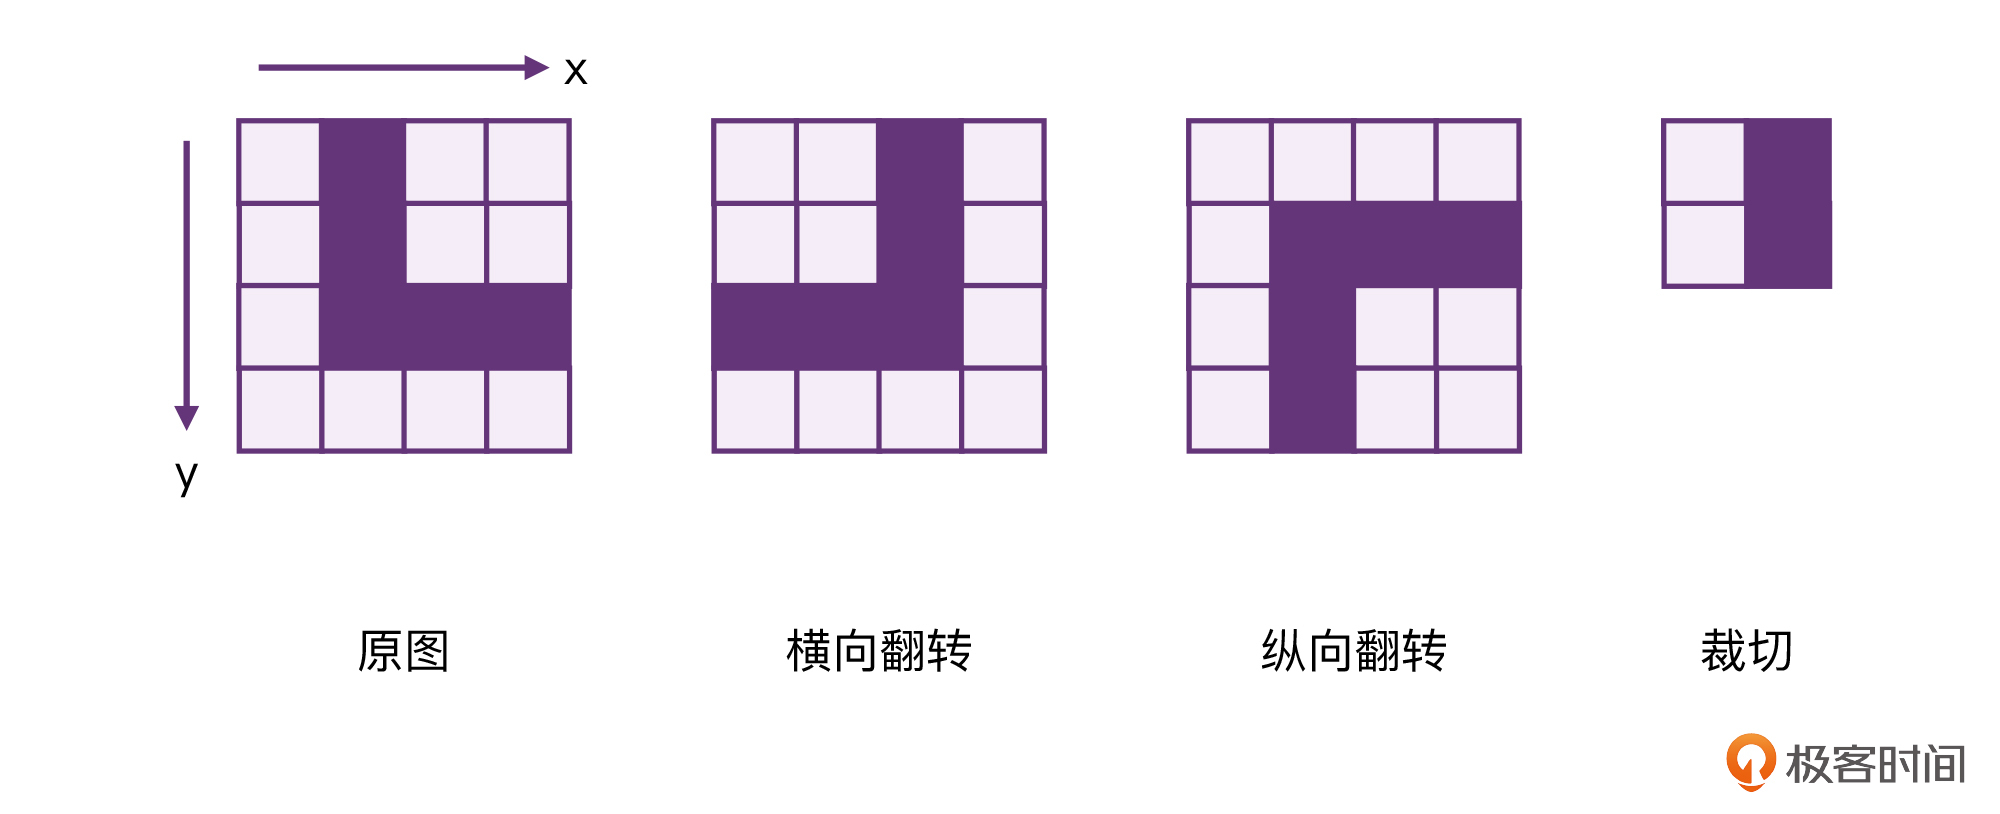
这其实就相当于一个抽象的模型,如果我们基于这张4X4的照片,继续分析翻转和裁切,就会容易很多。我们可以来画一个简单的图形:
|
||
|
||
|
||
|
||
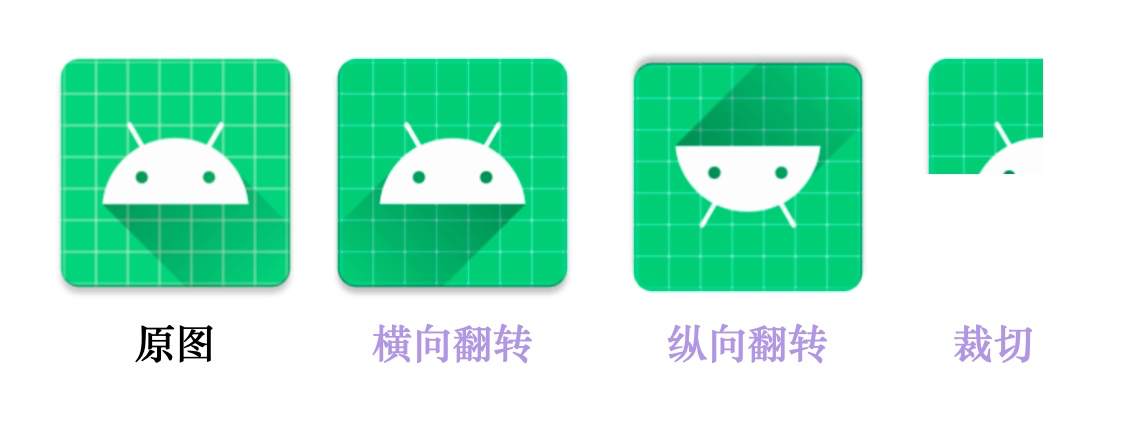
上面这张图,从左到右分别是原图、横向翻转、纵向翻转、裁切。其中,翻转看起来是要复杂一些,而裁切是最简单的。
|
||
|
||
|
||
|
||
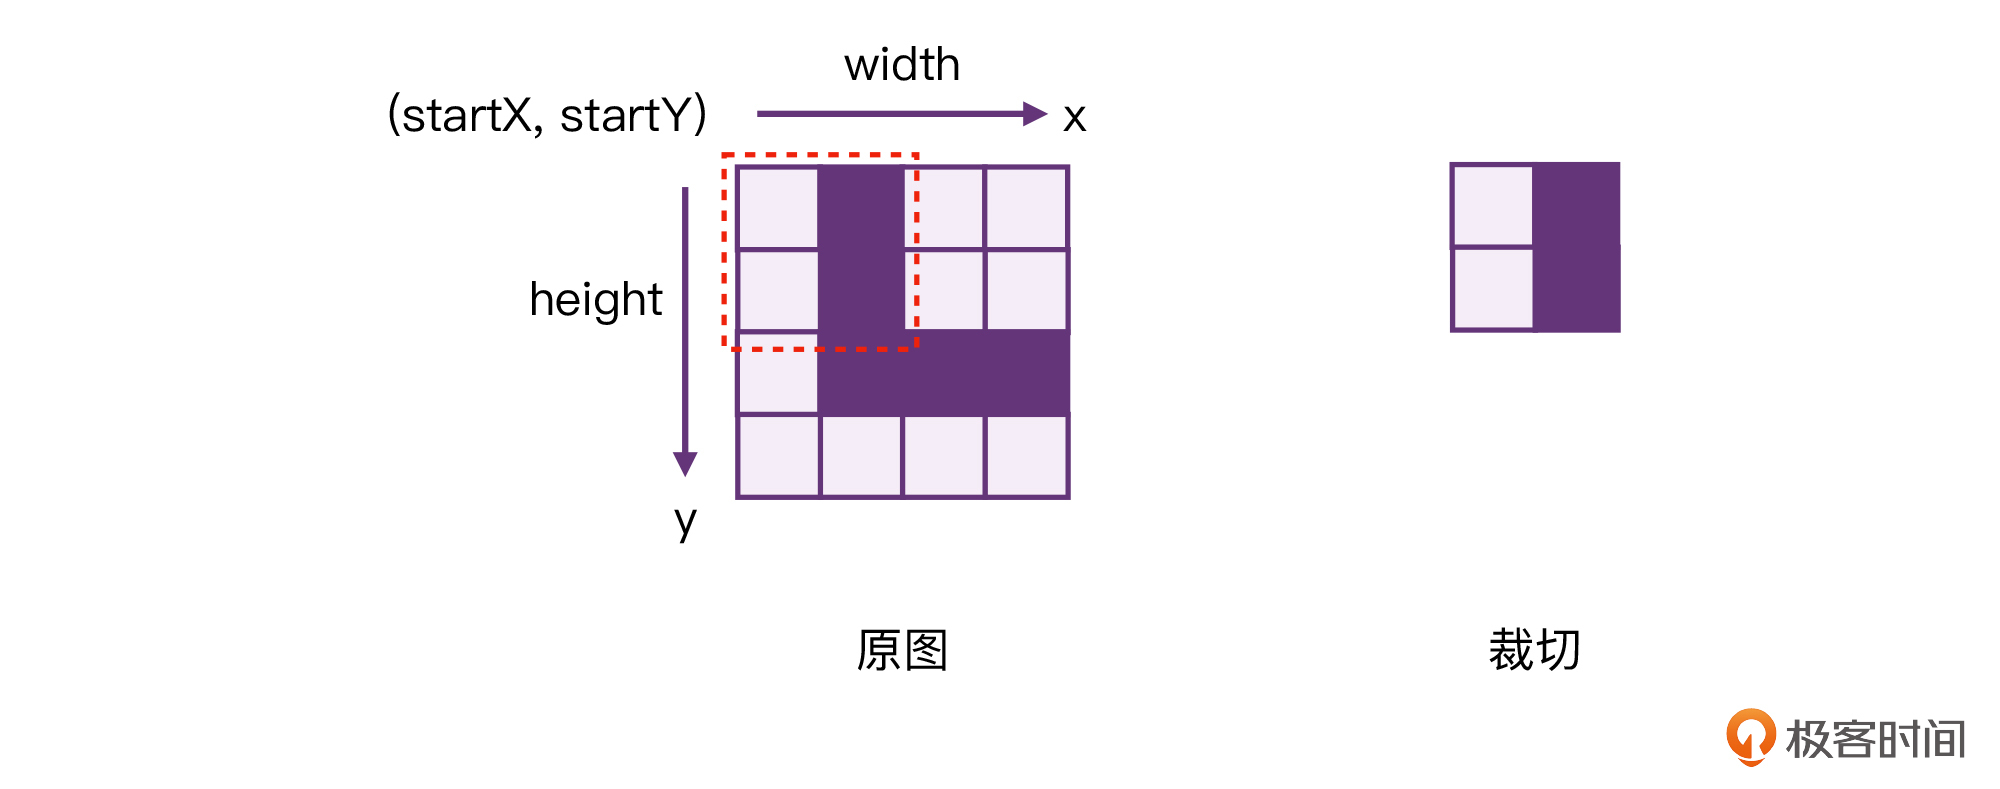
我们先来处理裁切。对于裁切,其实只需要将图片当中某个部分的像素拷贝到内存,然后存储成为一张新图片就行了。
|
||
|
||
```plain
|
||
/**
|
||
* 图片裁切
|
||
*/
|
||
fun Image.crop(startY: Int, startX: Int, width: Int, height: Int): Image {
|
||
val pixels = Array(height) { y ->
|
||
Array(width) { x ->
|
||
getPixel(startY + y, startX + x)
|
||
}
|
||
}
|
||
return Image(pixels)
|
||
}
|
||
|
||
```
|
||
|
||
以上代码中,我们创建了一个新数组pixels,它的创建方式是通过Lambda来实现的,而Lambda当中最关键的逻辑,就是 `getPixel(startY + y, startX + x)`,也就是从原图当中取像素点。
|
||
|
||
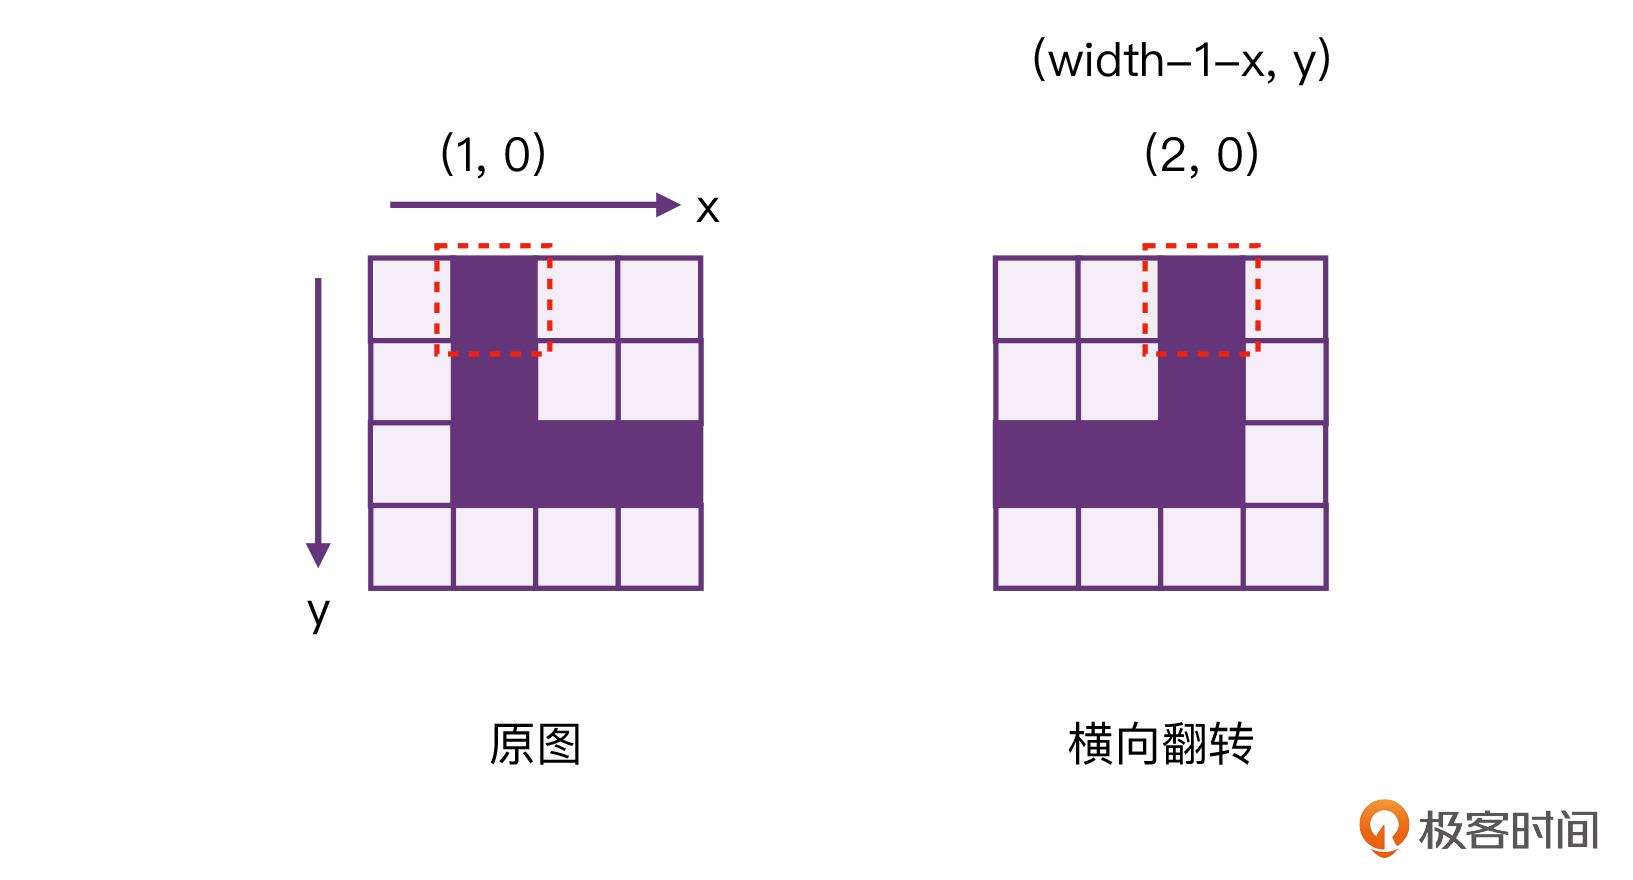
这代码是不是比你想象中简单很多?其实,图片的翻转也是一样的。只要我们能**找出坐标的对应关系**,代码也非常简单。
|
||
|
||
|
||
|
||
可以看到,对于原图的(1, 0)这个像素点来说,它横向翻转以后就变成了(2, 0)。所以,对于(x, y)坐标来说,横向翻转以后,就应该变成(width-1-x, y)。找到这个对应关系以后,我们就直接抄代码了!
|
||
|
||
```plain
|
||
/**
|
||
* 横向翻转图片
|
||
*/
|
||
fun Image.flipHorizontal(): Image {
|
||
val pixels = Array(height()) { y ->
|
||
Array(width()) { x ->
|
||
getPixel(y, width() - 1 - x)
|
||
}
|
||
}
|
||
return Image(pixels)
|
||
}
|
||
|
||
```
|
||
|
||
可见,以上这段代码几乎跟裁切是一模一样的,只是说,裁切要限制宽高,而翻转则是跟原图保持一致。
|
||
|
||
看到这里,相信你也马上就能想明白纵向翻转的代码该如何写了!
|
||
|
||

|
||
|
||
我们还是以(1, 0)这个像素点为例,在纵向翻转以后就变成了(1, 3),它们的转换规则是(x, height-1-y)。
|
||
|
||
```plain
|
||
/**
|
||
* 纵向翻转图片
|
||
*/
|
||
fun Image.flipVertical(): Image {
|
||
val pixels = Array(height()) { y ->
|
||
Array(width()) { x ->
|
||
getPixel(height() - 1 - y, x) // 改动这里
|
||
}
|
||
}
|
||
return Image(pixels)
|
||
}
|
||
|
||
```
|
||
|
||
所以说,只要我们能找到中间的转换关系,纵向翻转的代码,只需要在横向翻转的基础上,改动一行即可。
|
||
|
||
### 单元测试
|
||
|
||
其实针对图像算法的单元测试,我们最好的方式,就是准备一些现有的图片案例。比如说,我们随便找一张图,用其他的软件工具,对它进行翻转、裁切,然后存储起来。比如还是这四张图:
|
||
|
||
|
||
|
||
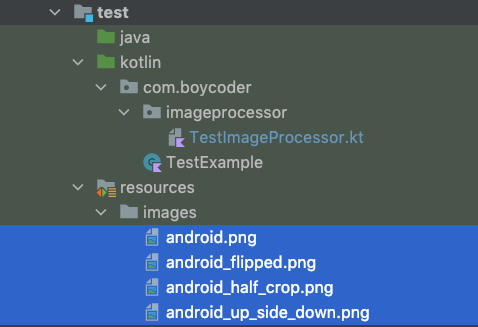
我们可以把处理后的图片保存在单元测试的文件夹下,方便我们写对应的测试用例。
|
||
|
||
|
||
|
||
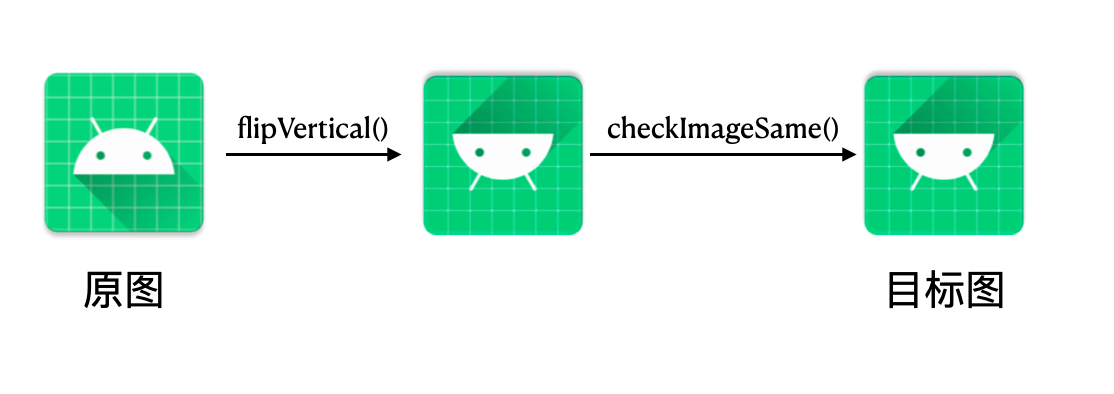
那么,有了这些图片之后,我想你应该就能想到要怎么办了。这时候,你只需要写一个图片像素对比的方法checkImageSame()就好办了。
|
||
|
||
```plain
|
||
private fun checkImageSame(picture: Image, expected: Image) {
|
||
assertEquals(picture.height(), expected.height())
|
||
assertEquals(picture.width(), expected.width())
|
||
for (row in 0 until picture.height()) {
|
||
for (column in 0 until picture.width()) {
|
||
val actualPixel = picture.getPixel(row, column)
|
||
val expectedPixel = expected.getPixel(row, column)
|
||
assertEquals(actualPixel, expectedPixel)
|
||
}
|
||
}
|
||
}
|
||
|
||
```
|
||
|
||
其实,这个函数的思路也很简单,就是逐个对比两张图片之间的像素,看看它们是不是一样的,如果两张图所有的像素都一样,那肯定就是一样的。
|
||
|
||
有了这个方法以后,我们就可以快速实现单元测试代码了。整体流程大致如下:
|
||
|
||
|
||
|
||
```plain
|
||
@Test
|
||
fun testCrop() {
|
||
val image = loadImage(File("${TEST_BASE_PATH}android.png"))
|
||
val height = image.height() / 2
|
||
val width = image.width() / 2
|
||
val target = loadImage(File("${TEST_BASE_PATH}android_half_crop.png"))
|
||
|
||
val crop = image.crop(0, 0, width, height)
|
||
checkImageSame(crop, target)
|
||
}
|
||
|
||
@Test
|
||
fun testFlipVertical() {
|
||
val origin = loadImage(File("${TEST_BASE_PATH}android.png"))
|
||
val target = loadImage(File("${TEST_BASE_PATH}android_up_side_down.png"))
|
||
val flipped = origin.flipVertical()
|
||
checkImageSame(flipped, target)
|
||
}
|
||
|
||
@Test
|
||
fun testFlipHorizontal() {
|
||
val origin = loadImage(File("${TEST_BASE_PATH}android.png"))
|
||
val target = loadImage(File("${TEST_BASE_PATH}android_flipped.png"))
|
||
val flipped = origin.flipHorizontal()
|
||
checkImageSame(flipped, target)
|
||
}
|
||
|
||
```
|
||
|
||
有了单元测试,我们就再也不用担心以后改代码的时候,不小心改出问题了。
|
||
|
||
好,那么到这里,1.0版本就算是完成了。我们接着来看看2.0版本。
|
||
|
||
## 2.0版本
|
||
|
||
2.0版本的任务,我们需要支持下载网络上面的图片,并且还要能够存起来。由于这是一个比较耗时的操作,我们希望它是一个挂起函数。
|
||
|
||
关于下载HTTP的图片,其实,我们借助OkHttp就可以简单实现。下面我们来看看代码。
|
||
|
||
> 补充:为了不偏离主题,我们不考虑HTTPS的问题。
|
||
|
||
```plain
|
||
fun downloadSync() {
|
||
logX("Download start!")
|
||
val okHttpClient = OkHttpClient().newBuilder()
|
||
.connectTimeout(10L, TimeUnit.SECONDS)
|
||
.readTimeout(10L, TimeUnit.SECONDS)
|
||
.build()
|
||
|
||
val request = Request.Builder().url(url).build()
|
||
val response = okHttpClient.newCall(request).execute()
|
||
|
||
val body = response.body
|
||
val responseCode = response.code
|
||
|
||
if (responseCode >= HttpURLConnection.HTTP_OK &&
|
||
responseCode < HttpURLConnection.HTTP_MULT_CHOICE &&
|
||
body != null
|
||
) {
|
||
// 1, 注意这里
|
||
body.byteStream().apply {
|
||
outputFile.outputStream().use { fileOut ->
|
||
copyTo(fileOut)
|
||
}
|
||
}
|
||
}
|
||
logX("Download finish!")
|
||
}
|
||
|
||
```
|
||
|
||
以上代码中,有一个地方是需要注意的,我用注释标记了。也就是当我们想要把网络流中的数据存起来的时候,我们可以借助Kotlin提供的 **IO扩展函数**快速实现,这样不仅方便,而且还不用担心FileOutputStream调用close()的问题。这个部分的代码,在Java当中,是要写一堆模板代码的。
|
||
|
||
下载本身的功能实现以后,挂起函数的封装也就容易了。
|
||
|
||
```plain
|
||
suspend fun downloadImage(url: String, outputFile: File): Boolean {
|
||
return withContext(Dispatchers.IO) {
|
||
try {
|
||
downloadSync()
|
||
} catch (e: Exception) {
|
||
println(e)
|
||
// return@withContext 不可省略
|
||
return@withContext false
|
||
}
|
||
// return@withContext 可省略
|
||
return@withContext true
|
||
}
|
||
}
|
||
|
||
```
|
||
|
||
这里,我们可以直接用 **withContext**,让下载的任务直接分发到IO线程。
|
||
|
||
代码写到这里,2.0版本要求的功能基本上就算是完成了。这样一来,我们就可以在main函数当中去调用它了。
|
||
|
||
```plain
|
||
fun main() = runBlocking {
|
||
val url = "http://xxxx.jpg"
|
||
val path = "${BASE_PATH}downloaded.png"
|
||
|
||
downloadImage(url, File(path))
|
||
|
||
loadImage(File(path))
|
||
.flipVertical()
|
||
.writeToFile(File("${BASE_PATH}download_flip_vertical.png"))
|
||
|
||
logX("Done")
|
||
}
|
||
|
||
// 将内存图片保存到硬盘
|
||
fun Image.writeToFile(outputFile: File): Boolean {
|
||
return try {
|
||
val width = width()
|
||
val height = height()
|
||
val image = BufferedImage(width, height, BufferedImage.TYPE_INT_RGB)
|
||
for (x in 0 until width) {
|
||
for (y in 0 until height) {
|
||
val awtColor = getPixel(y, x)
|
||
image.setRGB(x, y, awtColor.rgb)
|
||
}
|
||
}
|
||
ImageIO.write(image, "png", outputFile)
|
||
true
|
||
} catch (e: Exception) {
|
||
println(e)
|
||
false
|
||
}
|
||
}
|
||
|
||
/*
|
||
输出结果:
|
||
================================
|
||
Download start!
|
||
Thread:DefaultDispatcher-worker-1
|
||
================================
|
||
================================
|
||
Download finish!
|
||
Thread:DefaultDispatcher-worker-1
|
||
================================
|
||
================================
|
||
Done
|
||
Thread:main
|
||
================================
|
||
*/
|
||
|
||
```
|
||
|
||
通过运行结果,我们会发现图片下载的任务,已经被分发到IO线程池了,而其他的代码仍然在主线程之上。
|
||
|
||
## 小结
|
||
|
||
其实,课程进行到这里,你就会发现,Kotlin和Java、C之类的语言的编程方式是完全不一样的。Kotlin提供了丰富的扩展函数,在很多业务场景下,Kotlin是可以大大减少代码量的。
|
||
|
||
另外,你也会发现,当你熟悉Kotlin协程以后,它的使用一点都不难。对于上面的代码,我们通过withContext(Dispatchers.IO)就能切换线程,之后,我们就可以在协程作用域当中随意调用了!
|
||
|
||
## 思考题
|
||
|
||
你觉得,我们在downloadImage()这个挂起函数内部,直接写死Dispatchers.IO的方式好吗?如果换成下面这种写法,会不会更好?为什么?
|
||
|
||
```plain
|
||
suspend fun downloadImage(
|
||
coroutineContext: CoroutineContext = Dispatchers.IO,
|
||
url: String,
|
||
outputFile: File
|
||
): Boolean {
|
||
|
||
return withContext(coroutineContext) {
|
||
try {
|
||
downloadSync()
|
||
} catch (e: Exception) {
|
||
println(e)
|
||
return@withContext false
|
||
}
|
||
return@withContext true
|
||
}
|
||
}
|
||
|
||
```
|
||
|